

Stripe
Accept card, direct debit, and digital wallet payments through Stripe using PaymentKit. PaymentKit acts as the payment orchestrator and provides the required PCI compliance documentation used to enable Stripe’s raw card APIs.
Set up summary
To accept payments with Stripe in PaymentKit, you will need to:
- Request access to Stripe raw card APIs
- Enable raw card number processing in Stripe Dashboard
- Create Stripe API keys
- Connect Stripe to PaymentKit
- (Optional) Enable Bring Your Own Token (BYOT) on Stripe
- (Optional) Enable Apple Pay and Google Pay
Request access to Stripe raw card APIs
PaymentKit uses Stripe’s raw card APIs, which must be enabled by Stripe.
Here are all the docs you will need to share with Stripe when submitting your request:
- PaymentKit ASV Site Certification Attestation
- PaymentKit Compliance Certificate
- PaymentKit Self-Assessment Questionnaire (SAQ D-SP)
- VGS PCI DSS documentation
- PCI DSS document (SAQ A) — to be downloaded and completed by you before sending to Stripe
Submit a request through Stripe Support using the following message:
Hi,
I am requesting access to Stripe’s raw card data APIs for my account. PaymentKit serves as our PCI-compliant payment orchestrator and provides the required Self-Assessment Questionnaire (SAQ D) and On-Site Attestation of Compliance, which can be accessed at the following links:
- ASV Site Certification Attestation: https://storage.googleapis.com/trust.paymentkit.com/2026_Q1_asv_sitecert_attestation.pdf
- Compliance Certificate: https://storage.googleapis.com/trust.paymentkit.com/2026_Q1_compliance_certificate.pdf
- Self-Assessment Questionnaire (SAQ D-SP): https://storage.googleapis.com/trust.paymentkit.com/SAQ_D-SP_18%20Feb%202026.pdf
Raw card data is handled by our PCI DSS-compliant third-party service provider, Very Good Security (VGS), which vaults and tokenizes card data on our behalf. As a payment orchestrator, we route either VGS-provisioned network tokens or raw PANs depending on the flow; VGS handles the raw card data in both cases. VGS’s PCI DSS documentation is here: https://storage.googleapis.com/trust.paymentkit.com/VGS-2026-PCI-DSS-v4-0-1-AOC-Service-Providers-Approved.pdf.
We’ve also attached our completed PCI DSS self-assessment questionnaire (SAQ A) listing PaymentKit and VGS as TPSPs.
Make sure you fill out the PCI DSS document (SAQ A) before you send it to Stripe with your request.
Stripe should get back to you within a few days.
Enable raw card number processing in Stripe Dashboard
Once Stripe has approved your raw card API access, you must enable the setting in your Stripe Dashboard to avoid warnings when PaymentKit processes payments.
- In your Stripe Dashboard, navigate to Settings > Integration
- Under the Advanced section, enable Allow processing of raw card numbers
For more details, see Stripe’s documentation on enabling access to raw card data APIs and Stripe’s integration security guide.
If this setting is not enabled, Stripe will display a one-time warning about full card numbers being passed to their API. This is expected behavior — PaymentKit’s secure proxy (VGS) detokenizes card aliases before forwarding them to Stripe. Enabling this setting acknowledges that your integration intentionally sends raw card data.
Create Stripe API keys
PaymentKit requires Stripe API keys to securely connect to your Stripe account.
- In your Stripe account, navigate to the API keys page
- Create a restricted API key
- How will you use this API key: Providing this key to another website
- 3rd party name: PaymentKit
- 3rd party URL:http://app.paymentkit.com/
- Copy the following values:
- Publishable key
- Restricted secret key
Connect Stripe to PaymentKit
- Navigate to Orchestration → Payment processors
- Click Add Processor and select Stripe
- Enter your publishable key and restricted key
- Turn on the payment methods you want to accept payments in (for Apple Pay and Google Pay, you will need to complete the additional steps below)
Enabling Bring Your Own Token (BYOT) on Stripe
In order for us to route network tokens through your Stripe account, BYOT needs to be enabled on your end. Network tokens are more secure than raw card numbers, reduce declines, and stay valid even when a card is reissued or updated, so enabling this helps transactions route more reliably. Use the template below to request this from Stripe support.
Subject: Request to enable Bring Your Own Token (BYOT)
Hi,
We’d like to request that BYOT be enabled on our account: [Stripe account ID].
This is a production account with estimated annualized PIV of [$ amount]. We vault cards via VGS (AOC here) and compliance is covered through VGS’s PCI attestation for network token vaulting.
We operate a multi-processor setup (in addition to Stripe, we use [other PSPs, e.g. Adyen, Airwallex, Authorize.net, NMI]) and need to pass the same network tokens across processors so customers aren’t required to re-enter card details depending on which processor handles a given transaction. This is a token portability need, not a tokenization gap, so Stripe Managed Tokens (SMT) doesn’t cover this use case.
Thank you.
Enable Apple Pay and Google Pay
Register Your Domain
A custom domain is required before digital wallets can be enabled.
- Register your domain in Stripe here
- Verify the domain
Add Apple Pay and Google Pay as accepted payment methods
After your domain is registered:
-
Navigate to Orchestration → Payment processors
-
Edit your Stripe processor settings
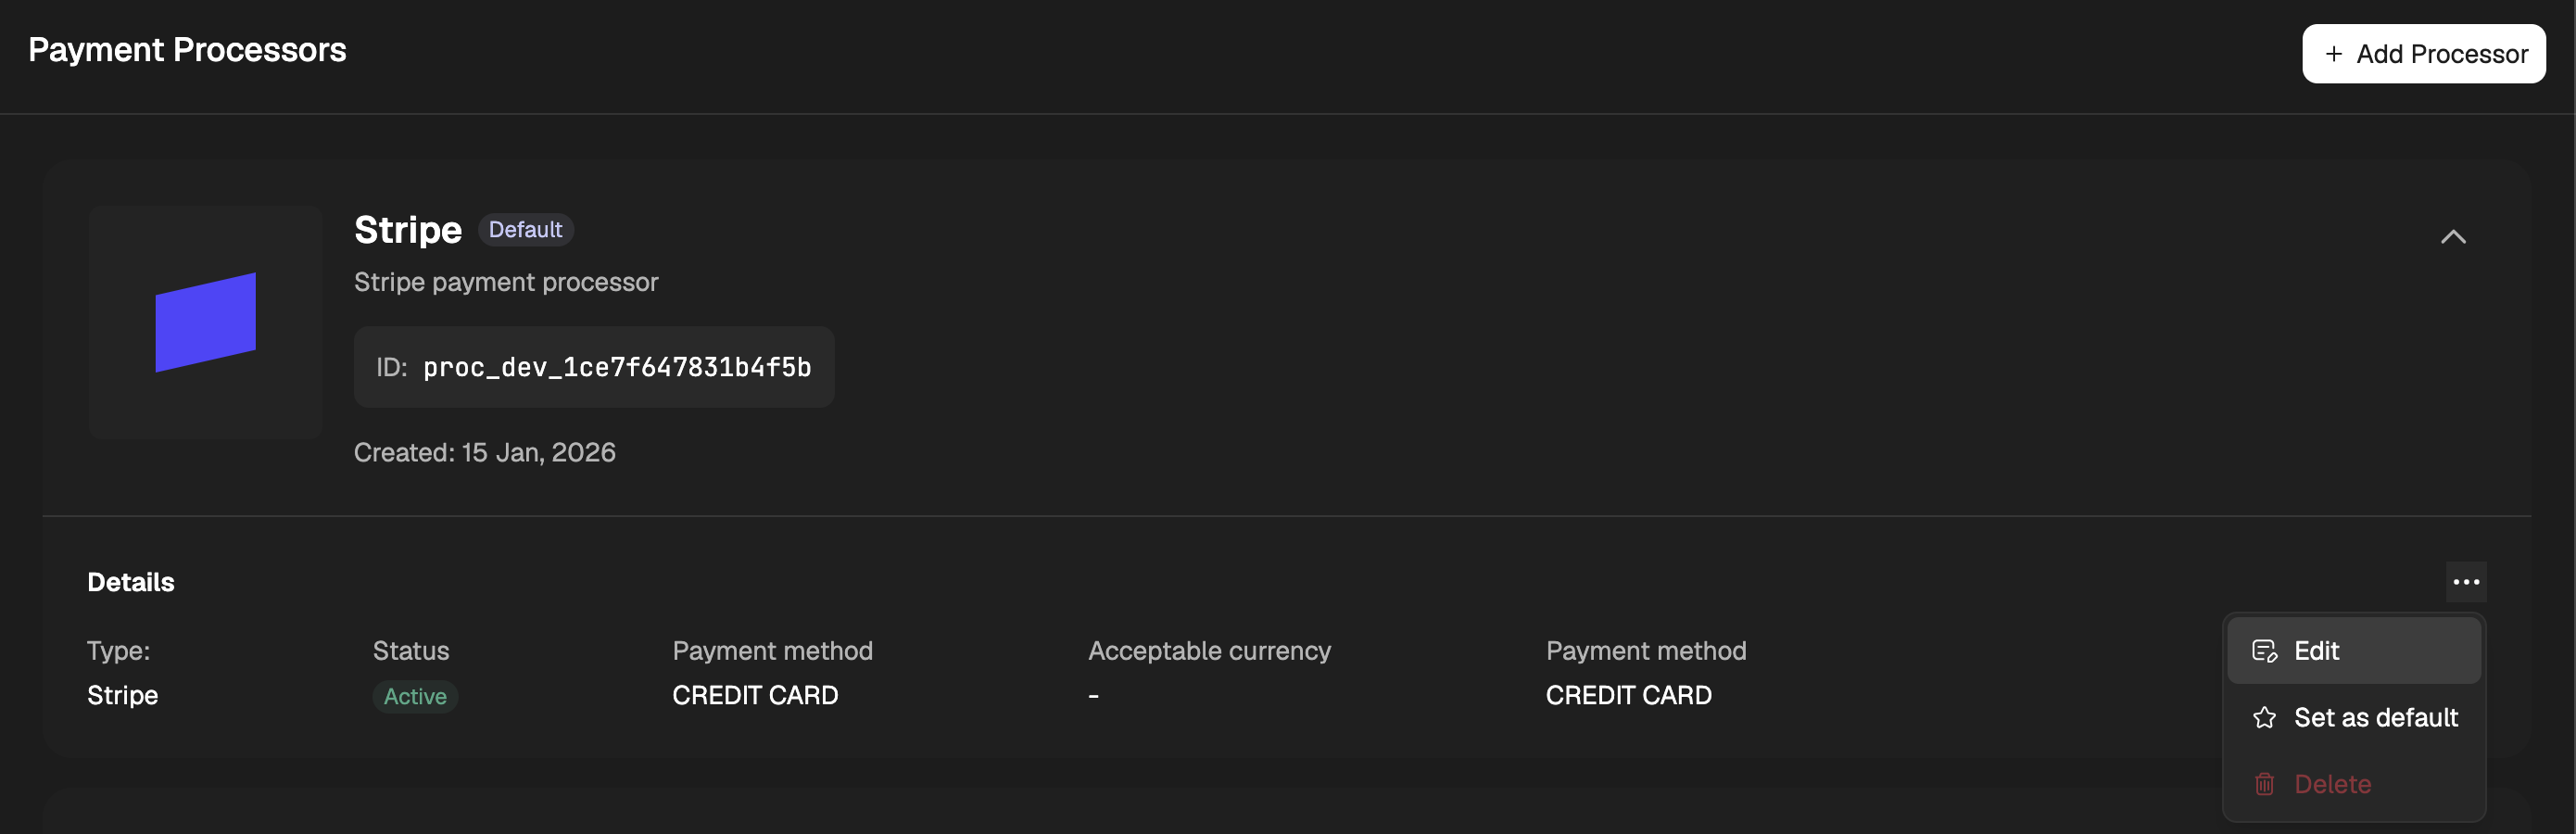
-
Add Apple Pay and Google Pay as accepted payment methods
Notes on how wallet availability works
PaymentKit does not control whether Apple Pay or Google Pay is shown. Availability is determined entirely by Stripe based on device, browser, and wallet configuration.
Availability Summary
Apple Pay
- Safari on macOS, iOS, and iPadOS
Google Pay
- Android devices
- Supported Chrome desktop browsers
For full requirements, see Stripe’s documentation here.
You can also compare expected behavior using Stripe’s demo pages here and here.
Stripe Link
Stripe Link is Stripe’s one-click wallet: returning shoppers who have a Link account can pay with a saved card without re-entering their card details. In PaymentKit, Link is offered as a checkout wallet on Stripe processors, alongside Apple Pay and Google Pay.
Stripe Link is only available on Stripe processors. It is non-fungible — a Link payment is always processed by the Stripe processor that collected it and is never routed to another processor.
Enable Stripe Link
- Navigate to Orchestration → Payment processors
- Edit your Stripe processor
- In the wallet section, turn on Stripe Link
Unlike Apple Pay and Google Pay, Stripe Link does not require registering a custom domain — enabling the payment method is all that’s needed.
Link is only offered at checkout when it is enabled on the Stripe processor the checkout is routed to. If a checkout is routed to a non-Stripe processor, Link is not shown.
How Stripe Link appears at checkout
PaymentKit renders Link in one of two ways, chosen automatically per shopper:
- Express button — shown when the shopper already has an authenticated Link session, letting them pay in one click near the top of the checkout.
- Link tile — shown otherwise, as a selectable method in the checkout’s payment-method list. Selecting it mounts the same Link element so the shopper can authenticate.
As with Apple Pay and Google Pay, PaymentKit does not control Link eligibility. Whether a shopper sees Link — and which cards are available inside it — is determined by Stripe based on the shopper’s Link account, device, and browser.
Payment mode vs setup mode
A checkout session runs in one of two modes, and Link supports both:
- Payment — charges the shopper now. The Link payment method is attached to the customer and a payment is created and confirmed.
- Setup — saves the Link payment method for later use without charging (for example, to collect a reusable method before a trial or for future invoices).
When a checkout includes recurring line items, PaymentKit saves the Link method with an off-session mandate so future renewals can charge it. A Link method saved without that mandate is declined by Stripe on off-session renewal charges — PaymentKit handles this for you when Link is used through PaymentKit’s checkout.
Custom checkout integration
If you’re building a fully custom Link flow instead of using <ElementsForm />, PaymentKit.js exposes Link through a callback-driven API — initStripeLink() mounts the element and onLinkResult() delivers the outcome. Unlike Apple Pay and Google Pay, Link is not confirmed via paymentKit.submit(): Stripe renders the button and fires its own confirm event.